
We've worked alongside some of the world's finest temperature calibration equipment manufacturers to bring you software that's truly unique. Now, whatever equipment you use, or are about to purchase, the chances are that it will work
with Caliso Temps.
| Isotech | MilliK, MicroK, TTI-22, TTI-2, TTI-7, Switchboxes, ALL Calibration Blocks and Baths |
| Fluke Calibration (Hart Scientific) | Calibration Blocks and Furnaces, 1529 Chub-E4 Precision Thermometer, Surface Probe Calibrator, Black Stack, Super DAQ |
| Yokogawa | GX10/GP10 Paperless Recorders |
| SIKA | TPM Calibration Blocks |
| Kambic | Calibration Baths and Blocks |
| Cropico | Series 3000 Precision Thermometer |
| ASL | F200, F150, F250, B-series calibration blocks |
| Dostmann | P600 hand-held digital thermometer, ATP4200, DDM900 and DDM1000 Precision Thermometers |
| Jofra | CTC, ETC, ITC Calibration Blocks, DTI-1000 Precision Thermometer |
| Techne | Standard and H-series Calibration Blocks, Accu-Temp, Accu-Temp II |
| Druck | DBC series dry-block calibrators |
| Labfacilty | LabCal Plus and Tempmaster Precision Thermometers |
| WIKA |
CTR 3000 Precision Thermometer CTD and CTB series calibration blocks |
| Additel | 875 series calibration blocks |
| Julabo | Calibration Baths |
Caliso Temps is made up of 2 separate Windows applications:
- Laboratory Interface where you connect your instruments and automate your calibration tests to gather calibration data
- Builder where you analyse your data, perform calculations, and also design and make calibration certificates
Let's have a look at them both:
1. The Instrument Connection Panel
The left-hand panel of the Interface window is the Device Palette.
As you can see, this has a number of tabs across the top. Each tab has the name of a temperature
calibration equipment manufacturer such as Isotech, ASL, HART Scientific,
LabFacility, etc.
By clicking on each tab you will see a series of icons which represent the specific instruments supported for each manufacturer.
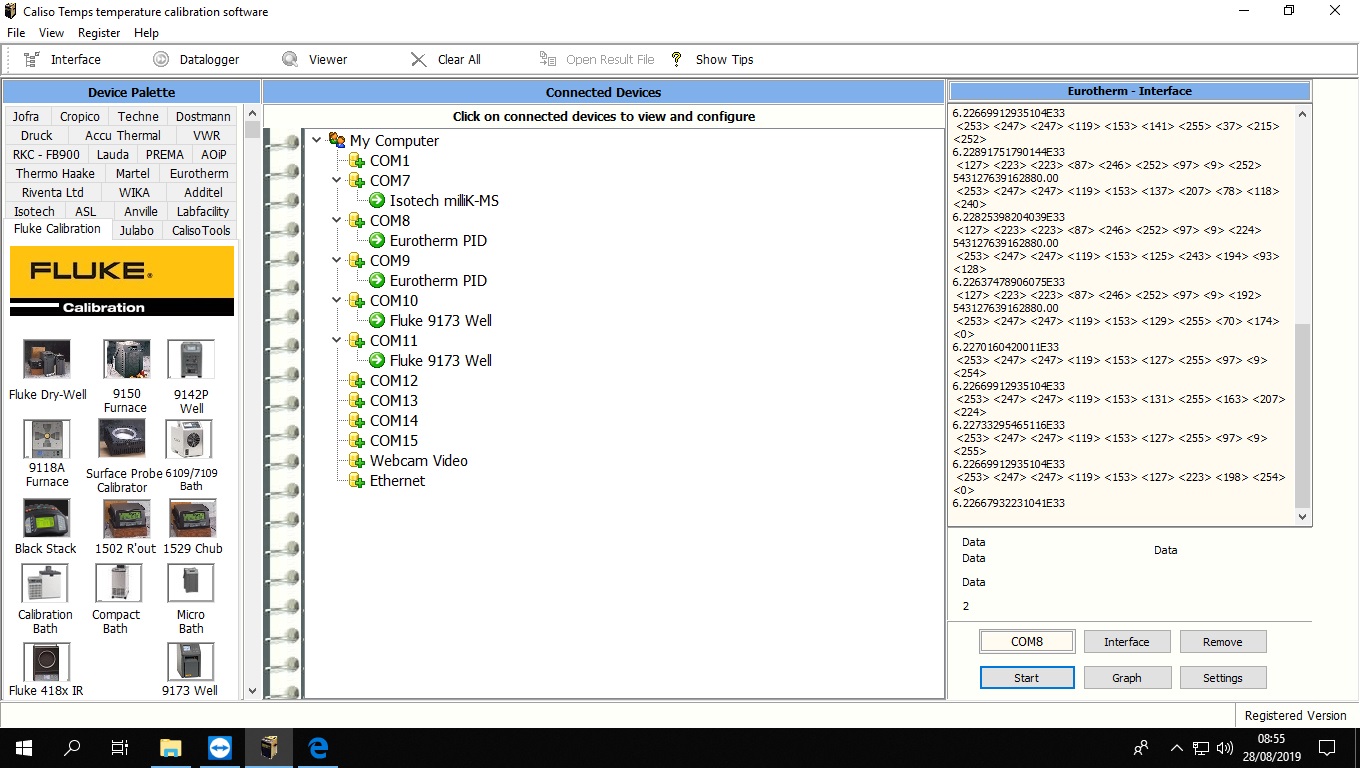
To connect an instrument to a serial port simply select the manufacturer’s tab on the Device Palette and drag and drop the icon of the required instrument on to the serial
port on the Connected Devices panel.
(This is the large central panel of the Interface, and is where you will see listed under "My Computer" all the COM ports and web-cams available for connection.)
Click the Start button - and that's it, you are
now connected. You can have as many instruments as you have serial ports - all running together.
2. Webcam Support
Not every piece of temperature equipment is capable of communicating directly with your computer, these will include:
- Simple digital temperature indicators
- Mercury (or liquid) in glass thermometers
- Paper chart recorders
Nevertheless, you may still need to calibrate such devices. The Caliso Temps
Laboratory Interface allows you to do this using standard, low cost digital cameras
(web-cams). It does this by taking a still-image picture of whatever the camera is
pointing at when the stability criteria for each set-point are met.
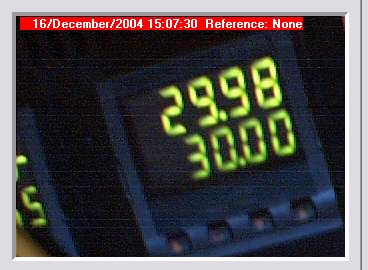
At the end of the test you will have a series of "JPG" images that capture the image of the instrument for
each set-point. The temperatures may then be read from these images. In the top left-hand corner of each image you will see a red box that contains the date and time at which the image was captured together with the reference value at
stability.
Configuring your calibration couldn't be simpler. You just need to set a few parameters including:
- Number of test points
- The stability criteria for the reference temperature data
- The set-point values
- Logging Interval
- Bath, or block, parking temperature
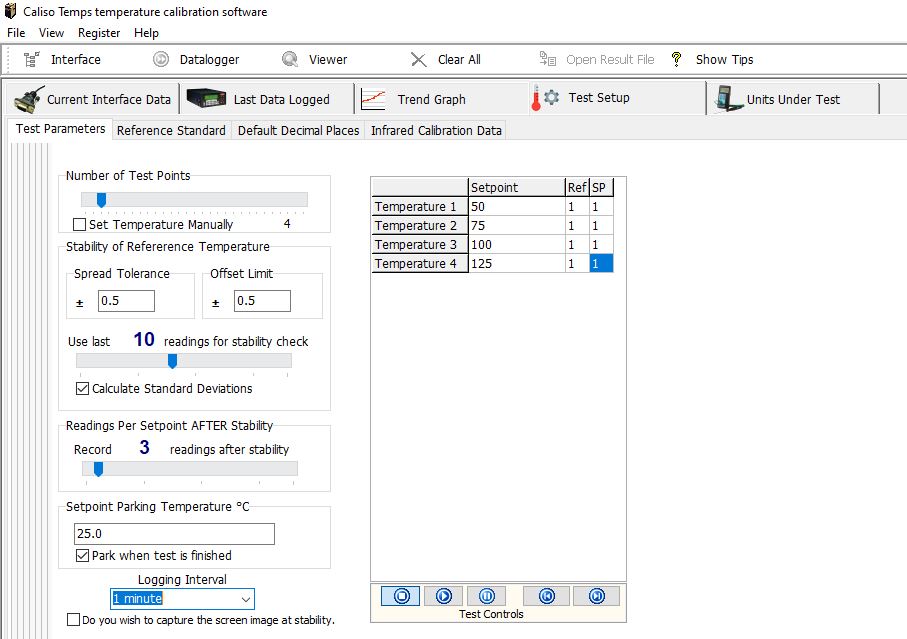
The final step is to specify the location for your run data files. Start the test and you're away.
That’s it, you need do no more! The software will now do the rest of the work for you,
setting the block to the correct temperatures and recording data values for you. You could sit and watch, and that's what you'll probably do for a while. Then you'll realise that you could be doing something much more useful instead.
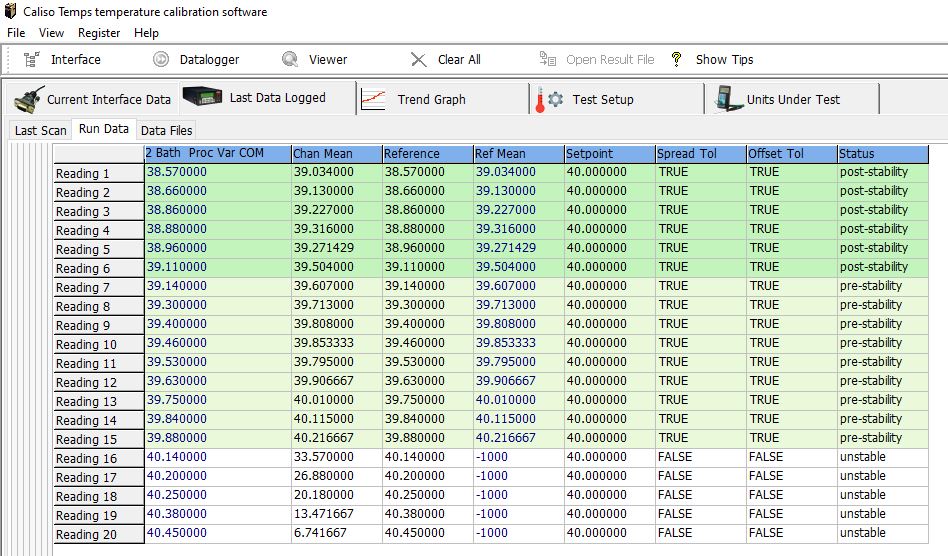
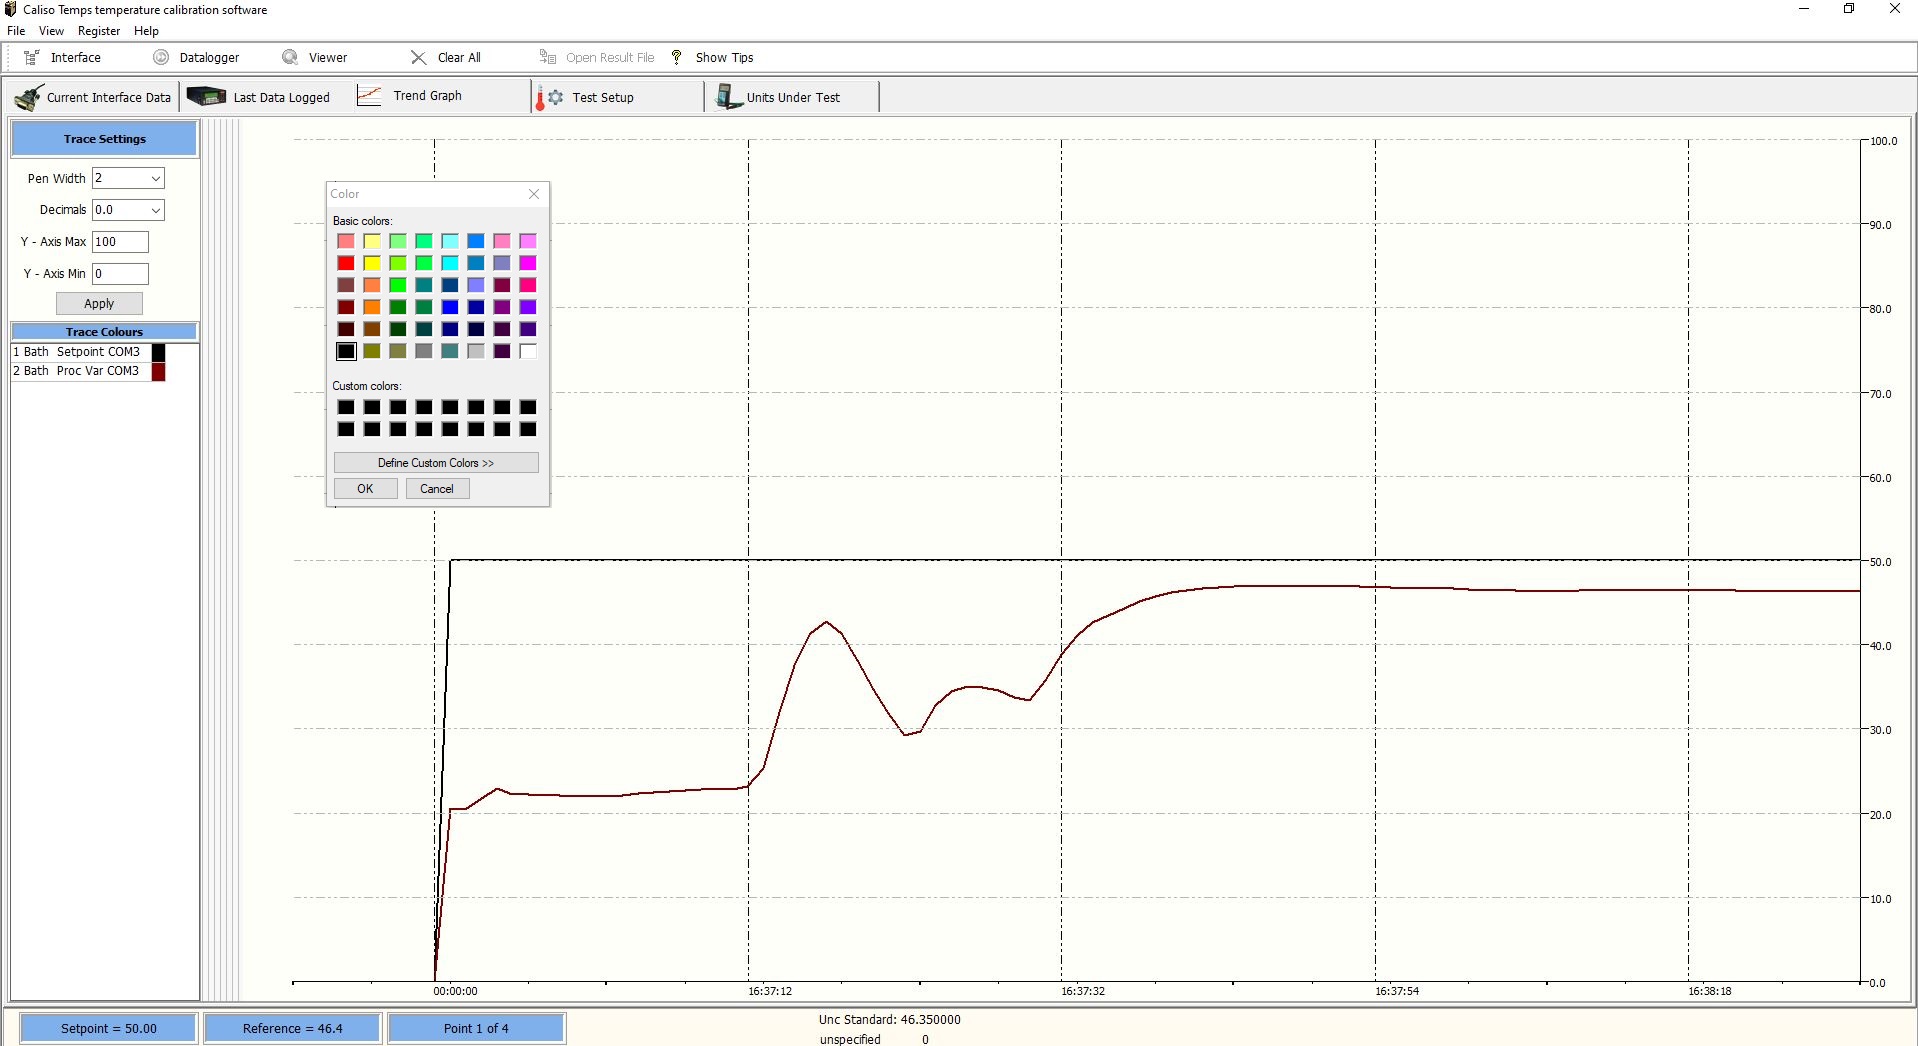
Run data is grouped according to the set-points used in the tests. You will see a spreadsheet-like grid containing data from individual set-points of your
test run. Along the bottom you will see a row of tabs indicating the temperature of
each individual set-point. Click these to show the data for each of the set-points.
Caliso Temps Laboratory Interface produces two types of data file. The first is a text
file, which contains in tab delimited format all of the logged data from the start to the
finish of the test. It therefore contains a complete record of the calibration test
regardless of any stability criteria that may apply. The file may be exported directly to
a word processor or a spreadsheet (such as MS Excel).
The second type of file is a CDT (Caliso Temperature Data) file and this is used in
Builder to perform calculations of calibration co-efficient and to generate calibration
certificates.
5. Trend Graphs
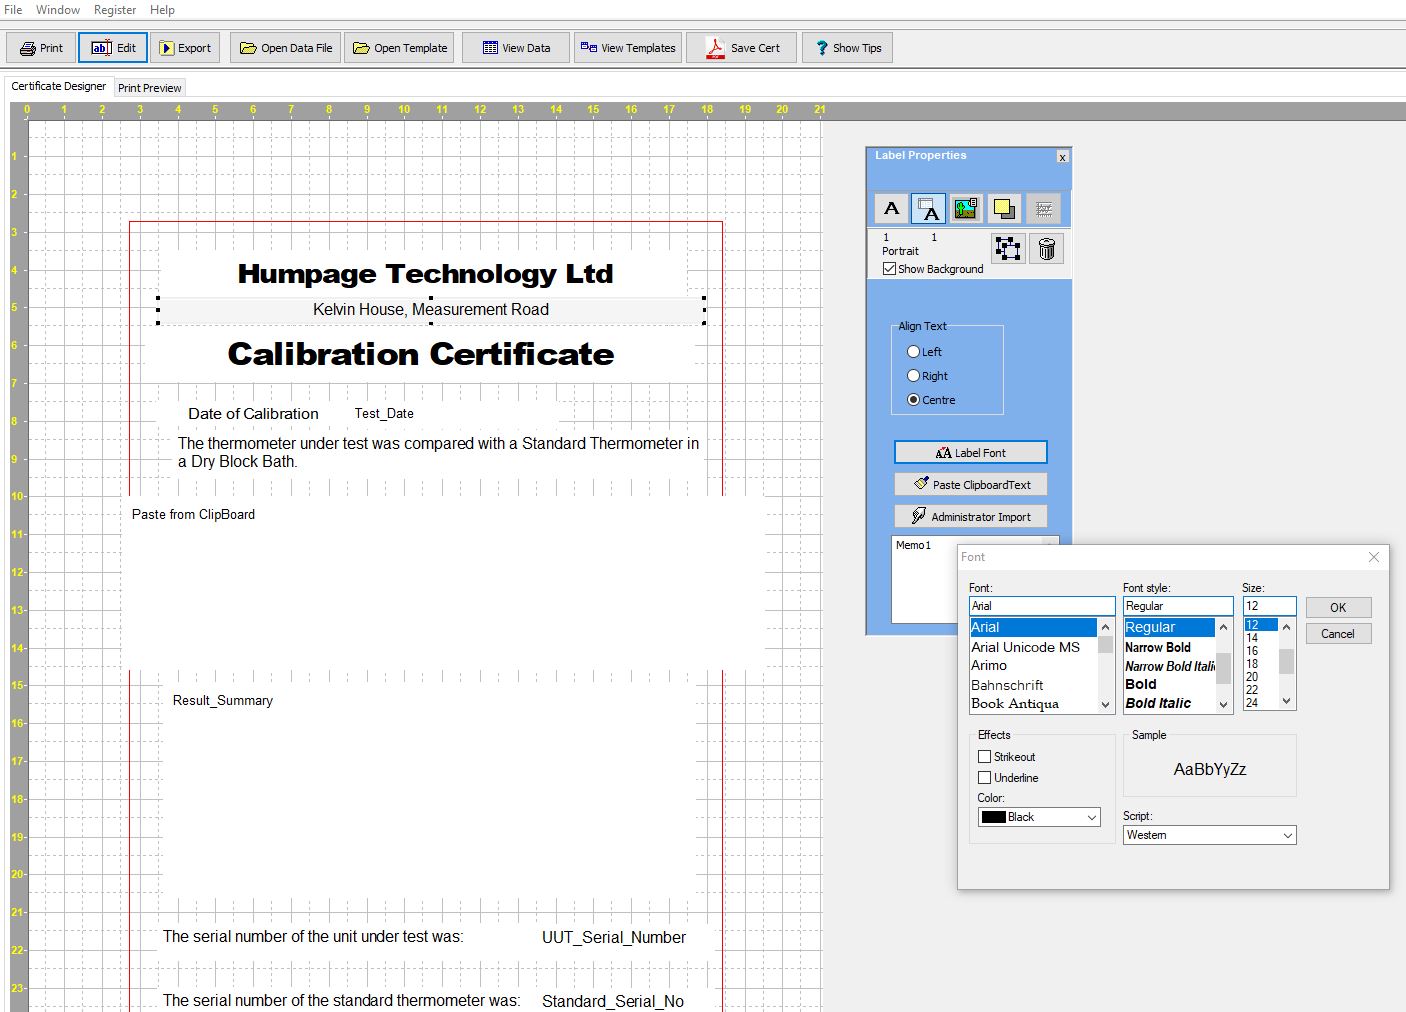
6. Creating Calibration Certificates
Whilst some sample templates are included we feel sure that you will enjoy making
calibration certificates using Caliso Temps Builder. All the tools needed to produce great
looking certificates quickly and easily are here. Your certificate templates can contain
several pages, you could, for example, have some pages in portrait and others in
landscape, incorporate logos, text and, of course, calibration data.
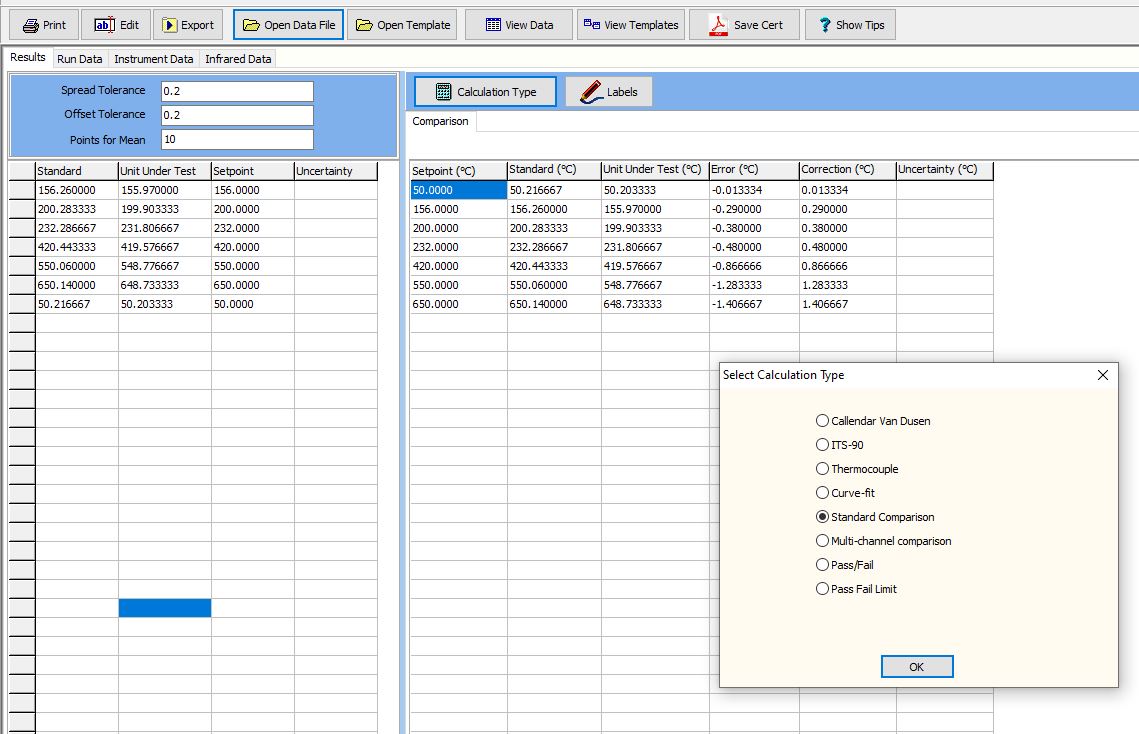
7. Data Analysis
The Builder’s Data Viewer enables you to turn raw calibration data into calibration information of the following types:
- Callender Van Dusen coefficients
- ITS-90 coefficients
- Thermocouple correction coefficients
- Polynomial regression coefficients
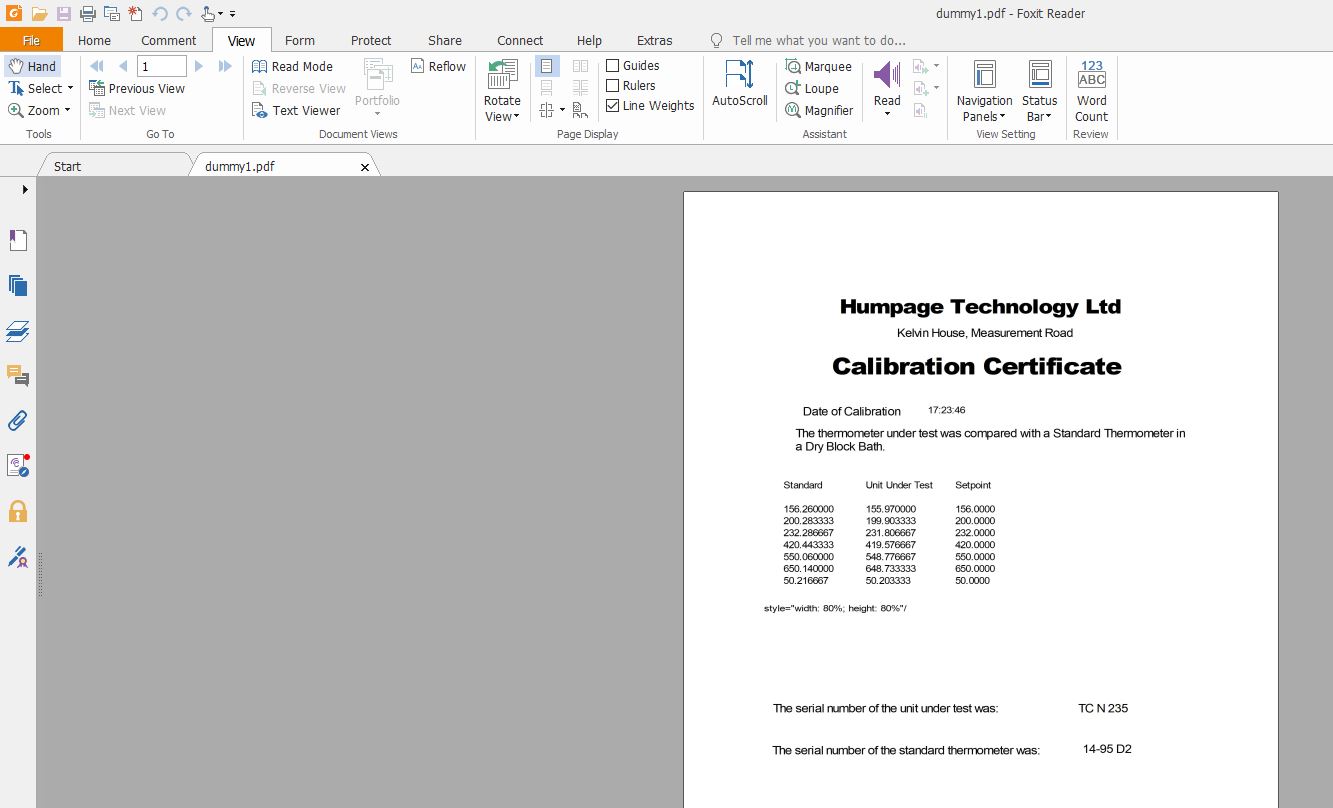
8. Calibration Certificate – Job done!
Congratulations!
You are now about the take the final, and in some ways, simplest step. You have
used Caliso Temps Laboratory Interface to set-up an automated temperature calibration, and saved the data
in CTD format. You then used Caliso Temps Builder to design a certificate template that
exactly matches your requirements, with Data Containers, text and graphics. All that
remains to do now is to use all of this to make calibration certificates.
Video Tutorials
We've put together a series of seven short video tutorials to enable you to get the most out of Caliso Temps. They will show you the main features of this leading temperature calibration software, from setting-up an interface, through to running a test and, finally, producing calibration certificates.
The videos are in Realplayer "mov" format which is supported by most PCs and a wide range of tablets.
Please let us know if you have any problems viewing these videos.
- Lab Interface:
Connecting Equipment - Lab Interface:
Webcam Support - Lab Interface:
Instrument Communications and Data Interface - Lab Interface:
Setting Up and Starting a Test - Lab Interface:
Setpoints and Reference Temperature Stability - Builder:
Designing Calibration Certificate Templates - Builder:
Calculations and Generation of Calibration Certificates
| 1. Lab Interface: Connecting Equipment | View in mp4 format | View in mov format |
| 2. Lab Interface: Webcam Support | View in mp4 format | View in mov format |
| 3. Lab Interface: Instrument Communications and Data Interface | View in mp4 format | View in mov format |
| 4. Lab Interface: Setting Up and Starting a Test | View in mp4 format | View in mov format |
| 5. Lab Interface: Setpoints and Reference Temperature Stability | View in mp4 format | View in mov format |
| 6. Builder: Designing Calibration Certificate Templates | View in mp4 format | View in mov format |
| 7. Builder: Calculations and Generation of Calibration Certificates | View in mp4 format | View in mov format |
